How to set up Google reCAPTCHA
Getting started
- Open the Google ReCAPTCHA Admin page
- Sign in or create a new account if necessary
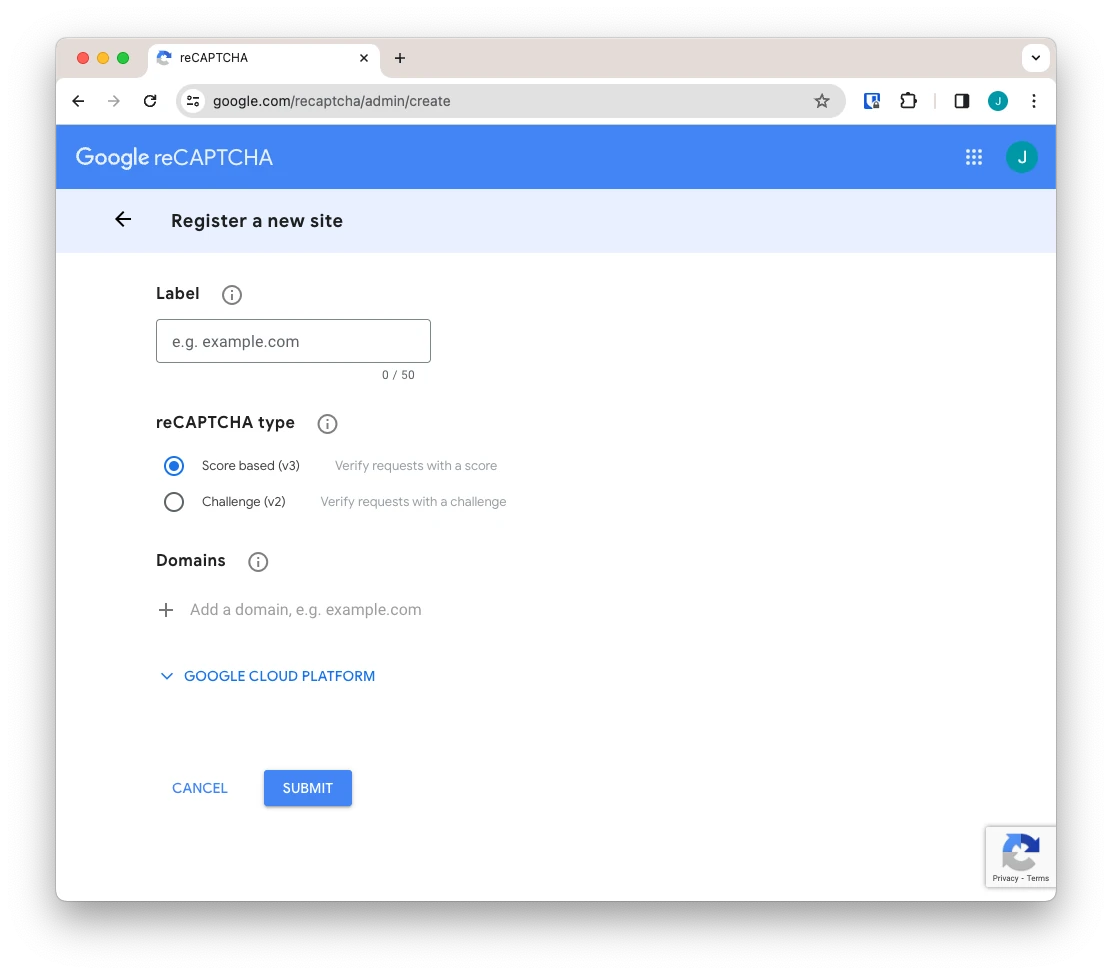
- You should now be on the ‘Register a new site’ page shown below:
To ensure our developers can get your existing site code setup and working again with a new reCAPTCHA key, we are going to create two different keys:
- Score based (v3)
- Challenge (v2)
After setup, our developers will delete any unused keys, leaving only the relevant one needed for your website.
Setup ‘Challenge (v2)’
Please fill in these fields:
- Label: type your domain name and the key version (e.g: ‘kaweb.co.uk v2’)
- reCAPTCHA type: check ‘Challenge (v2)’
- Domains: type your domain name (e.g ‘kaweb.co.uk’) and click the +
Now click ‘SUBMIT’.
You should now see a page similar to this:
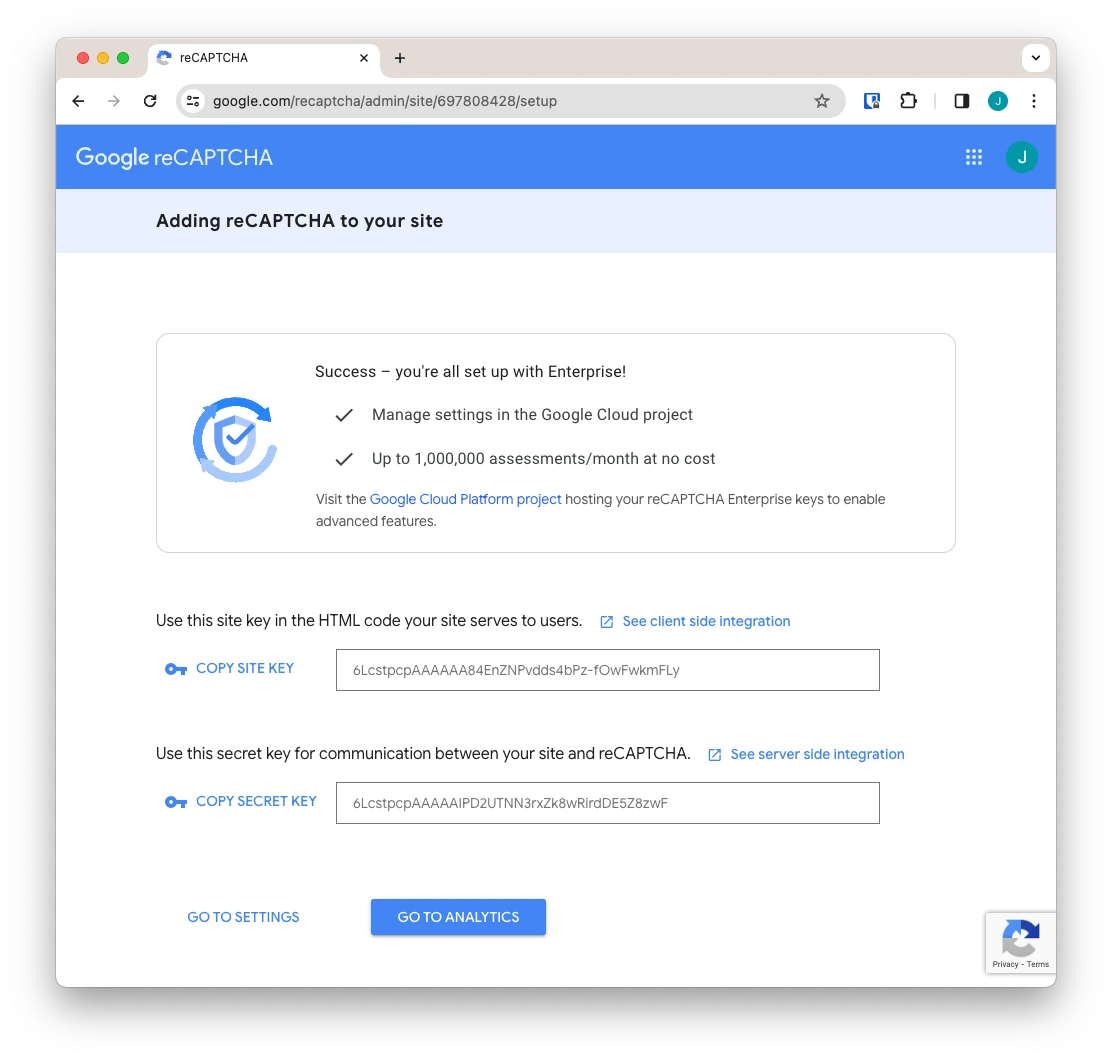
Click ‘GO TO SETTINGS’ which should take you to a page similar to this:
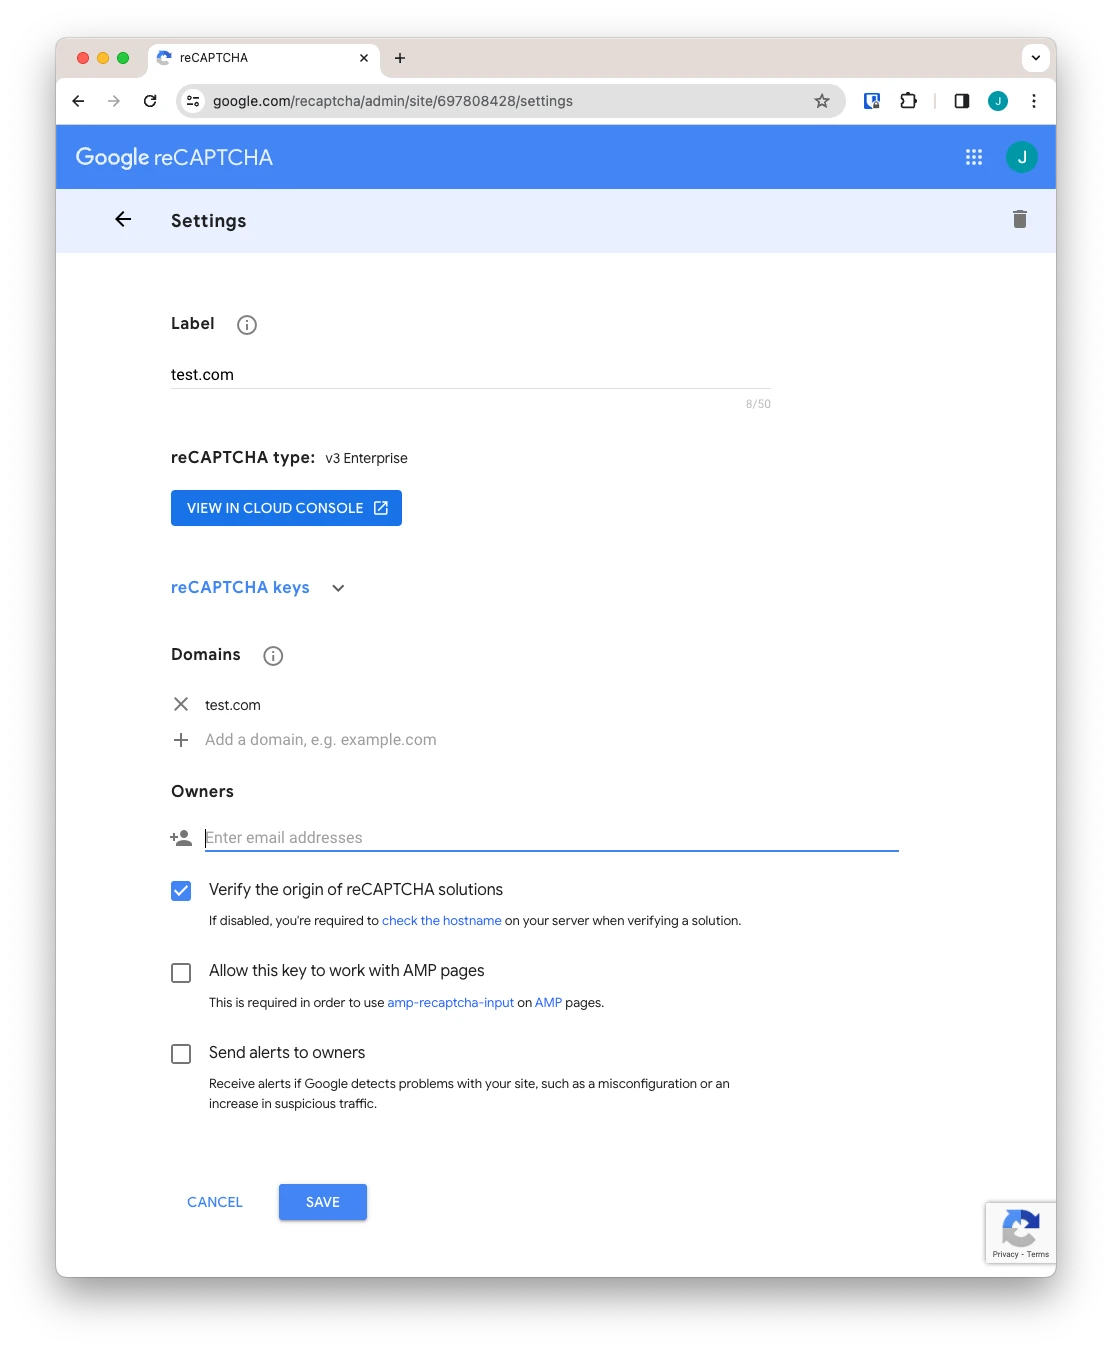
Please fill in these fields:
- Owners: type in ‘[email protected]’ and press the enter key
Now click ‘SAVE’.
This will allow us to view your key and update your website.
Setup ‘Score based (v3)’
Follow the same steps as above, but select ‘Score based (v3)’ as the reCAPTCHA type on the first screen.
Setup billing
Now we need to set up billing details against your account and enable them to work with your reCAPTCHA Enterprise projects, even if you intend to stay within the 10,000 assessments per month (starting 01/04/2024).
- Open the Google Cloud Billing page
- Sign in with the same account used to create the reCAPTCHA keys in the previous steps
You should see a page similar to this:
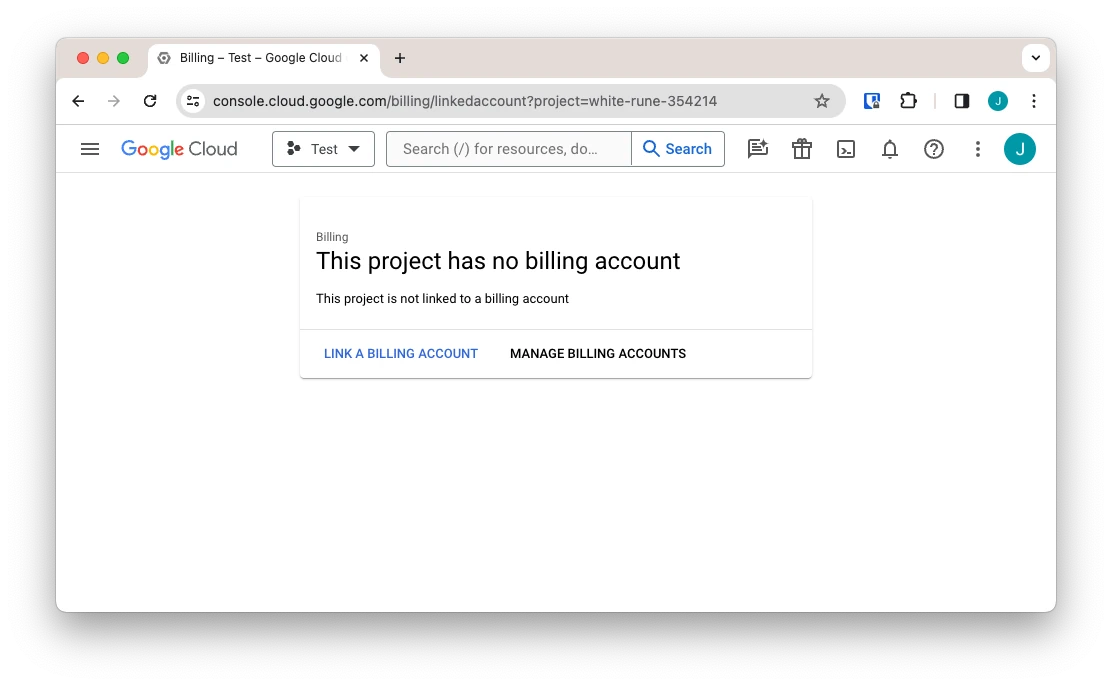
Click ‘MANAGE BILLING ACCOUNTS’ which should take you to a page similar to this:
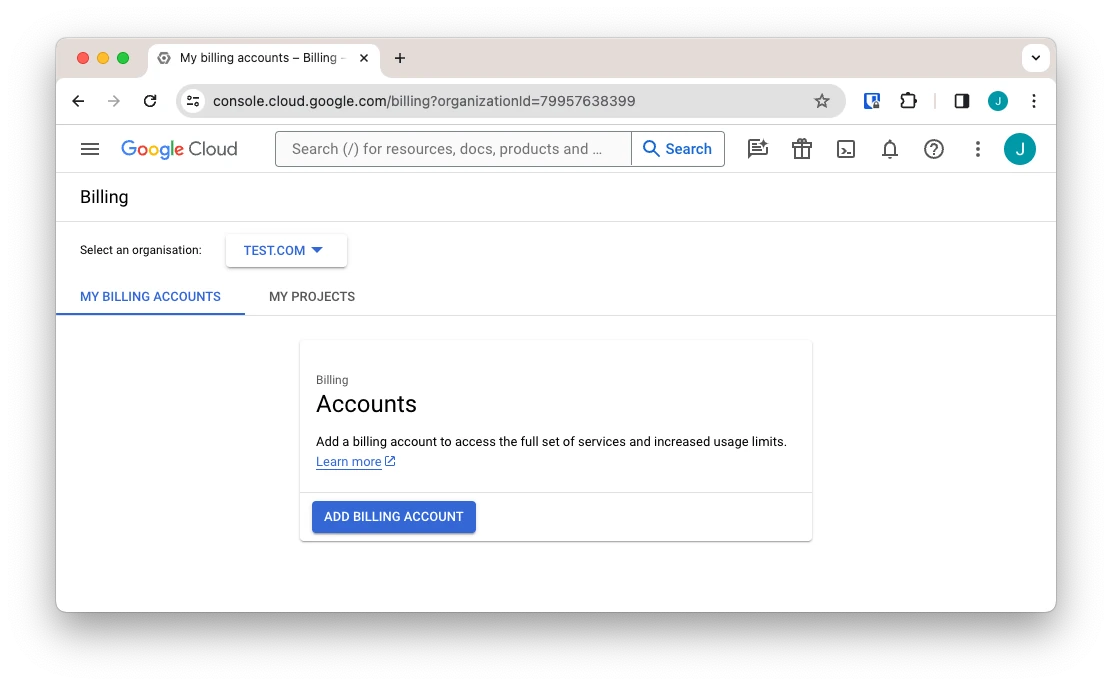
Click ‘ADD BILLING ACCOUNT’ which should take you to a page similar to this:
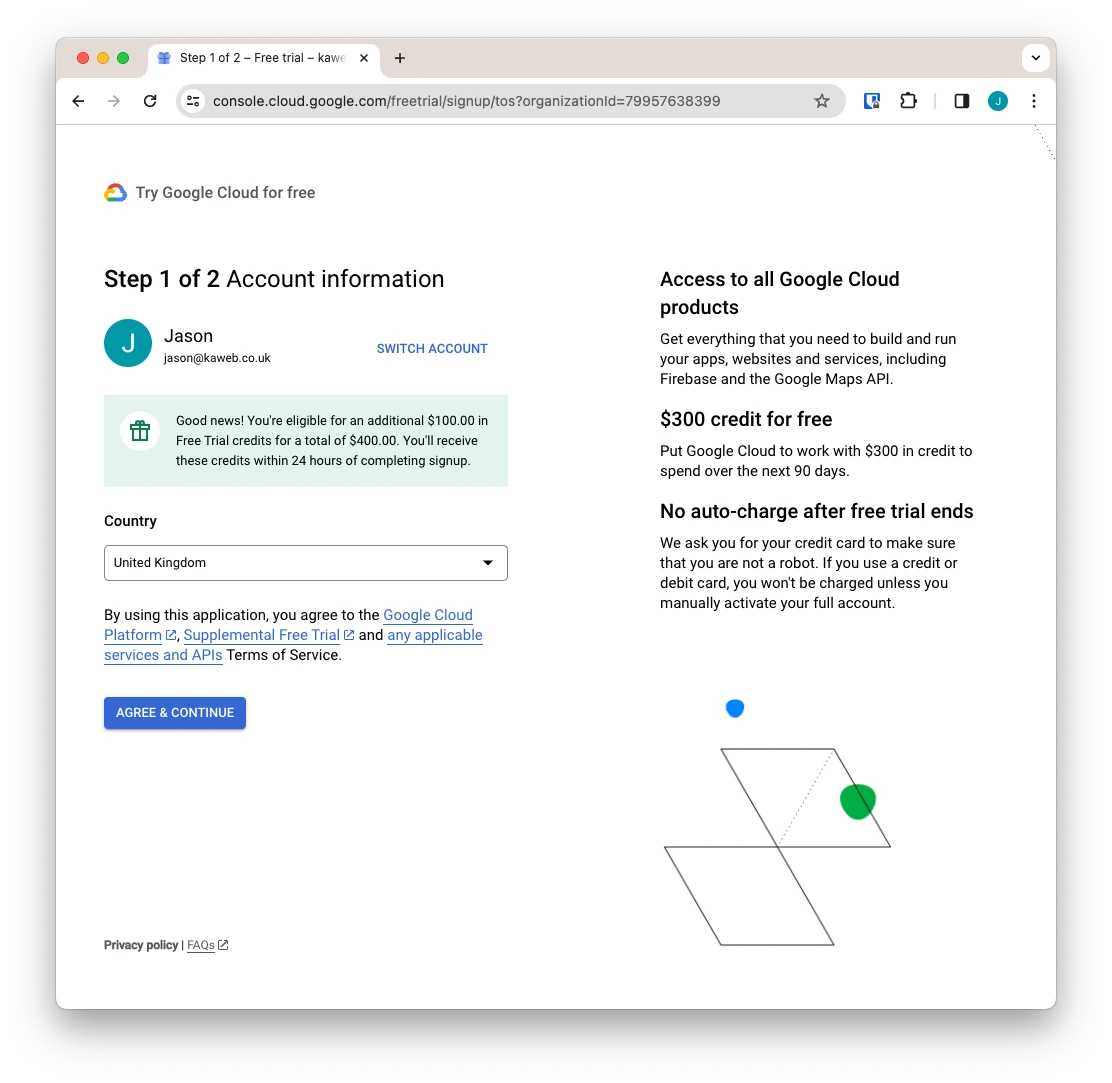
At this point, you may be forced to take them up on a free trial that includes $300 free usage for the first 90 days. Unfortunately this means the account automatically pauses after 90 days, so you must enable billing manually now to avoid disruption.
If you upgrade before the trial is over, any remaining unexpired Free Trial credits remain in your Cloud Billing account and you can continue to use the resources you created during the Free Trial without interruption.
Please fill in this field:
- Country
Click ‘AGREE AND CONTINUE’.
On the next page, please fill in these fields:
- What best describes your organization or needs?
Click ‘Other‘, then ‘Next’. - What brought you to Google Cloud?
Click ‘Other‘, then ‘Next’. - What are you interested in doing with Google Cloud?
Click ‘Other‘, then ‘Next’. - What best describes your role?
Click ‘Other’, then ‘Next’.
Enter your billing details, card details, and billing address now and submit the form.
Your billing should now be setup.
Prevent account pausing
We now need to prevent the account from pausing after 90-days or before the $300 credit runs out.
Open the Google Cloud page, which should look similar to this:
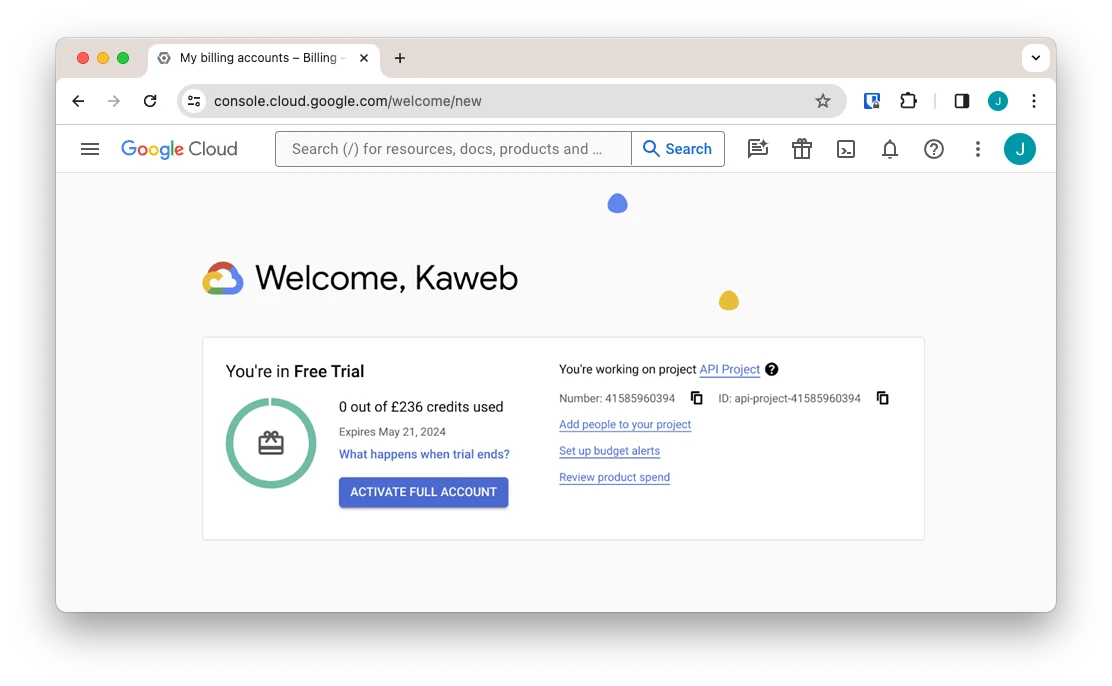
Click ‘ACTIVATE FULL ACCOUNT’.
You’re all set!
If you’re worried about spending money without knowing, now is a good time to follow the ‘Set up budget alerts’ link to create email alerts when you spend over a certain amount of money in a given month/day.
